My Piano LED Visualizer
Bringing my piano practice to life by building a custom LED visualizer, controlled by a Raspberry Pi and a custom web interface.
The Inspiration: Recreating a Learning Tool
Piano has been my hobby since middle school, where I first started learning from YouTube videos. Recently, I decided to get more serious about my playing, so I enrolled in a few courses and started recording myself to track my progress. That's when I remembered the mesmerizing Synthesia-style videos I used to learn with—where the keys light up as they're played. I knew I had to replicate that effect on my own piano.
I searched online for a ready-made kit and found one, but the nearly $200 price tag was a bit shocking. That's what pushed me to research a DIY solution. I discovered I could build my own system for around $70 using a Raspberry Pi, turning a simple desire into a full-fledged technical project.
The Build: New Tools and New Skills
I bought all the necessary materials online, following a guide I found on GitHub. The project required some tools I didn't own and had never used before, but I was committed to learning.
- Learning to Solder: The project required a soldering iron to connect the LED strip. I dove in headfirst and, after a few questionable attempts, I learned how to create clean, strong solder joints without burning the house down! It was an invaluable hands-on skill to acquire.
- Headless Configuration via SSH: While experimenting, I had a cool breakthrough. I learned I could SSH into the Raspberry Pi remotely from my main computer. This allowed me to configure everything—the network, the Python scripts, the web server—without ever needing a dedicated monitor or keyboard for the Pi.
The Final Product: An Interactive Music Experience
The finished project is a sleek LED strip taped neatly above the piano keys, wired directly to a discreet Raspberry Pi Zero. The entire system is controlled by a custom web UI that I can access from my tablet, which sits perfectly on the music stand.
The visualizer has two main functions:
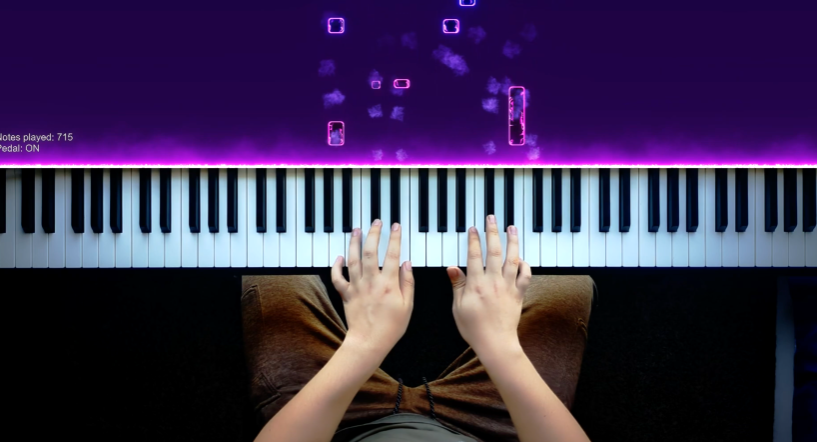
- Live Mode: Each key I press on the piano lights up the corresponding LED instantly, providing real-time visual feedback for my practice.
- Playback Mode: I can send pre-recorded MIDI files through the web UI, and the piano will play the song for me, lights and all—just like those Synthesia videos that inspired the whole project.
Skills Demonstrated
- Hardware Integration: Interfacing a Raspberry Pi with an LED strip and a MIDI keyboard.
- Basic Soldering & Electronics: Assembling and connecting electronic components safely and effectively.
- Headless System Configuration: Setting up and managing a device remotely using SSH.
- Software & Scripting: Using Python to process MIDI data and control hardware.
- Web Interface Development: Creating a simple web UI to control a physical device.
- Resourcefulness & Problem Solving: Choosing a cost-effective DIY solution over a commercial product and self-teaching the necessary skills.
Conclusion
This project was the perfect marriage of my passion for music and my interest in technology. It took me from a simple idea to a fully functional, custom-built device that I use regularly. More importantly, it pushed me to learn new, practical skills like soldering and remote system administration, which have significantly boosted my confidence and capabilities.